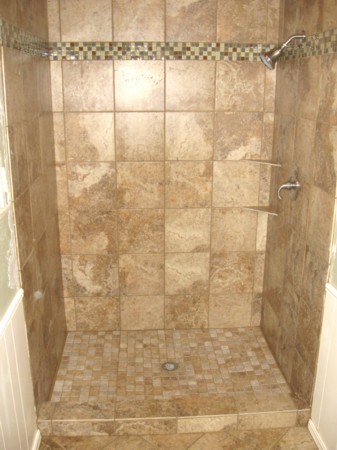
Installing tile in a shower stall for the DIY novice can be a simple easy weekend project. Take these tips into consideration will help put the project in the right direction. A step by step basis of what to do as well as the materials that are best suited for a shower stall are laid out here. Take the time to fully overlook the entire job and see what works best.

Step #1—Totally gut the shower stall from walls to floor. Be sure to take down old existing walls, all the way down to the studs. If a shower pan or any kind of non-permanent ceiling exist it’s best to take them out as well.
Step #2—Install a vapor barrier on the walls. Without a form of barrier to the studs the walls will be subjective to mold and mildew. This also keeps a barrier from the outside if installing into an older home, so this is a two way ‘win win’ situation. A sheet form barrier requires that it be tight and stapled to the walls around the shower insert. Make sure this is a one piece plastic so it’s fully sealed. To learn more about vapor seals take a look in for a Dallas Tile Outlet or any other outlet in the local area.
Step #3—Install Cement backer board. Backer board is like installing drywall. Cut into place and screw it down to the walls, floors etc. Never use drywall screws for this step. Specific seal coated screws that work best for cement board are available. Any major gaps in the board panels can be filled with fiberglass mesh tape and thinset. An alternative is using silicone caulk to fill in the holes and gaps.
Step #4—Finding the center of the shower walls and floors is important. Measure out each panel and get the course of the project in order. If dealing with an existing cement floor and the stall is not totally square then layout of the entire project is vital. If using a shower pan be sure to measure up at least 1/2” inch to the bottom edge walls before applying tile. This will allow for the pan to sit properly.
Step #5—Mix a small amount of thinset for the bottom row of the shower stall walls. This will be a good starting area if one has not been picked out.
#6—Dampen the cement board with a sponge or a light spray bottle. If the board is not damp it can easily pull the moisture from the thinset and cause the mortar to dry too quickly. In the long run this will be an issue as the bonding agent will turn brittle.
#7—Apply the thinset. Use a notched trowel to evenly apply. Be sure it’s thin enough and that do not use too much. An easy method to figure this out is to push a tile into place. Pull the tile away from the wall and look at the backside. If it looks dry or does not have adequate bonding agent then you are not using enough. If the project at hand is being started on the bottom row of the shower stall it’s recommended to install the bottom row and let set for 24 hours till dry. This allows for a perfect bottom line and an easy way to keep the walls straight. If installing in an older out of square stall area this bottom row installation idea is a must. To understand more on thinset take a look in for a Dallas Tile Outlet and any other outlet in the local area.
#8—Using thinset and spacers complete the project of installing the tiles.
#9—Allow the tiles to set for 24 hours. This is a good idea before grouting.
#10—Grout the tiles with a grout float. Wipe up excess with a damp sponge. Clean the sponge in water till the tiles are clear. Once the grout is installed let it set for 72 hours minimum.
Never install the shower pan before installing the tile. Cut a cardboard shape pan and tape in place to avoid damaging this fixture. Be sure to find the correct size of the trowel to use and the right spacers to install between the tiles. Keeping the job simple and finding out little short cuts here and there can be helpful. When choosing the tiles for this project make sure you are purchasing ones meant for the wall as floor tile (if not installing a pan) are different and must deter slipping and pressure, unlike the walls.
Shannon White has helpe many friends with tiling and now counts herself as an expert.

